Showing posts with label makeup. Show all posts

Sunday, July 9, 2017

My Picks: MAC Buy 2 Get 1 Free Lipsticks- Barbeque, Coral Bliss, and Mehr

L to R: Barbeque, Coral Bliss, Mehr
 MAC giving away product for free?? Must be dreamin' amiright? No need to pinch yourself, ladies and gents. MAC recently ran a superb special where you could buy any 2 lip products and get a third lippie free. I took advantage of this deal and got three lipsticks I have had my eye on for a bit.
 I chose 'Coral Bliss,' a pinkier leaning cremesheen formula, 'Barbecue,' a matte red with bright orange undertones, and 'Mehr,' a matte mauve a la Kylie Jenner lip craze.
All of these colors have quickly moved into my summertime rotation with Coral Bliss being my go to for an easy and bright lip look that goes with any outfit or makeup. Thanks to my friend from PT school Virginia for drawing my attention to this shade! Mehr will transition with ease into the cooler months and Barbeque will be reserved for when I want that stand out pout.

xxSJ

Thursday, June 18, 2015

Ipsy June 2015 Bag!

 Ipsy is a monthly subscription service that sends you 4-6 deluxe sample-sized products each month for the low cost of $10 including shipping. Ipsy is SO popular that in order to sign up for this subscription, you must first get yourself on their waitlist... I did just that weeks ago and completely forgot about it until I received an email that my June bag had shipped! It arrived a couple days ago so I thought I'd share my thoughts on these products and this service.

In this month's bag, I received 2 pairs of Altcheck Depuff Eye pads, a treStique eyeshadow pencil, a Smashbox photo finish face primer, an ItCosmetics brow pencil, and an Aurora Gel Effect nail polish. All of these goodies were housed in a black bag with 'ipsy' printed all over and bright orange zipper enclosure!
I was most excited by the ItCosmetics brow power pencil as this product claims to be a 'universal brow product.' Hmmmmm I'm hugely skeptical of that! I also thought the eyeshadow pencil was missing its cap at first but was relieved to find that the pencil-like pointed tip is really the cap housing the product inside! 
The eyeshadow color I got was 'Marimoto Pink Pearl' and it is really pretty! It is a light gold shimmery cream eyeshadow with peachy pink undertones. I wore this on my lids with a soft brown swept through the crease and it wore beautifully all day.  The brow pencil is in the color 'Universal Taupe' and it actually works pretty well for my brows. This product is meant to be lightly applied for blondes and then more heavily applied the darker your hair color. I could definitely see this color working for many people, though I recommend trying it out in store before purchasing this. The packaging is really nice as it is a weighty aluminum and there is a spoolie for eyebrow grooming on the opposite end of the pencil. 
The nail polish is a gel effect polish by the brand Aurora called '4 Alarm Fire.' I do really enjoy the color of this hot raspberry red, but I don't think the formula is all that great. I had chipping within 24 hours of application and the brush is huge making application a bit difficult on my tiny nails!

Overall I was impressed with the variety of samples in this bag. The value of each product is as follows:
Nail Polish $8
Smashbox Primer $8
Eyeshadow Stick $10
Eyebrow pencil $12
Eye pads $4

That puts the total value of this bag at $42! Not bad considering I only dropped $10 on it and these are all products I will get some use out of.

I really enjoyed my first experience with Ipsy but I don't think I will be continuing my subscription. I have a lot of makeup as is and I don't feel the need to have a ton of little samples lying around. I would definitely recommend Ipsy to people just starting to get into makeup though! It's an inexpensive monthly service that could introduce you to new makeup items and brands to expand your collection and its great for getting some travel sized products for weekend getaways ;)

Try out Ipsy for yourself Here!

xxSJ

Sunday, February 22, 2015

Colour Pop Eyeshadows 'Sequin' and 'Tea Party'

Colour Pop is an LA based indie brand that touts bringing the latest trends to the beauty industry at affordable prices.  They currently sell eyeshadows, blushes, and lipsticks at $5-$8 a pop.  Their eyeshadows are known to be revolutionary in texture and feel so I decided to give those a shot and placed my order with Colour Pop!
My package arrived in good time in an envelope mailer with a personalized note to me along with my eyeshadows. Some people really like this personal touch but for me, I could take it or leave it. The shadows were in small cardboard boxes with a window to see the colors inside.  Shipping is free on orders above $30 and otherwise costs $5.  When you join Colour Pop's mailing list, you get $5 off your first order.
The containers themselves are pretty cute with 'ColourPop' printed on top of the clear window in a holographic print, and the white plastic definitely makes the colors inside 'pop.' The downside is since this eyeshadow is meant to be applied with your fingers, these containers get dirty rather quickly! There are instructions telling you to make sure to screw the caps onto these shadows tightly between uses as the shadow is prone to drying up. 
 The colors I chose are Tea Party, which is described as 'a versatile soft peachy pink with gazillion silver glitters and subtle hints of pale pink glitter,' and Sequin, which is described as 'a copper penny like shade with silver and gold glitter.' The texture of these shadows really is unique as they feel a little foamy and squishy to the touch. It is truly something you have to feel for yourself to understand! 
Sequin blew me away with how gorgeously it swatched. It is a pigmented shadow with beautiful metallic finish. It is a true copper color leaning more peach than red. This color is great for all my blue and green eyed gals out there!  I have to admit that I was hugely disappointed in Tea Party at first swatch. There is almost no pigmentation in this color that looks like it should show up as a bright peach. The glitter in this shadow is the true star and I think would work well as a finishing touch on an eye look to add some sparkle and shine rather than as the main focus all over the lid. 
Here is the card that comes with the shadows describing how to use these shadows. Colour Pop really stresses that these are meant to be used with your fingers in order to get the most bang for your buck. I do recommend these shadows for beginners since you don't need any tools other than the ones you were born with (fingas, baby!!) and they can really work as slap on and go colors.

I think I will enjoy these colors a lot more in the Summer time when I am looking to do more fun and simple looks. While testing these out, people definitely noticed the glitter and sparkles and I got a few compliments!

I do think that if these shadows intrigue you you should try them out! At $5 each, you don't have much to lose and people generally like these. In fact, Temptalia awarded these as the best budget eyeshadows of 2014!

Check out Colour Pop HERE! if you're interested in seeing what this brand has to offer!

xxSJ

Thursday, February 12, 2015

Tutorial Try-It: MakeupbyTiffanyD's 'Sexy Shimmer Date Night' look!

Tiffany D is one of my favorite youtubers because she does makeup looks that seem a little more achievable than your average beauty guru. She keeps it real with the highlighting and contouring and does tutorials creating looks that are actually wearable for an everyday woman! She posted this tutorial for a 'Sexy Shimmer Date Night' look yesterday that already has 33,000+ views. I chose to recreate this look because she uses shadows exclusively from the Naked2 palette which I actually own!
The products Tiffany used for this look were:
Naked2 palette (Foxy, Bootycall, Tease, Verve, Chopper, Busted, and Blackout)
NYX Jumbo Eyeshadow Pencil in Milk
Stila Stay All Day Liquid Eyeliner in Dark Brown (I used the color Black)
Too Faced Better Than Sex Mascara (I used CoverGirl Clump Crusher
Ardell Whispies False Eyelashes (I didn't use fake lashes!)
The Naked2 palette! Filled with cool toned taupes and grays!
Here is the look I came up with after following Tiffany's tutorial:
 Overall I love the way this look turned out! The shimmer on the lids was definitely noticeable but it wasn't as bold as a metallic shadow pressed all over the lid. I also love her idea to mute the silver shade Verve by packing the pinky beige shade Chopper all over it. As Tiffany says in her video, it keeps you from looking like a robot!
Even with out the false eyelashes I think this look has some impact and drama. I love it for a date night and I could easily add false eyelashes to glam it up in no time. I also like that she didn't add any eyeliner to the lower lash line but instead smudged the plummy color Busted along the lower lash line for a smoked out effect.
As far as creating wearable looks that still hit the mark on drama and intensity, Tiffany nails it! Check out her video tutorial where she shows how to create this shimmery look and where my screengrabs are from! It's only 6 minutes long!!
Hope you liked this Tutorial Try-It!
Check out my other ones!
Allison Anderson's Sweater Weather look
Jaclyn Hill's Bombshell Look

xxSJ

Thursday, January 22, 2015

Tutorial Try-It: Allison Anderson's 'Sweater Weather' Tutorial

I adore Allison Anderson (formerly known as Amarixe) on Youtube because I feel like she is one of the beauty gurus who still keeps it real. This girl is the queen of eyeshadow tutorials and I feel she is severely underrated. I decided to attempt her 'Sweater Weather' tutorial, coming in at 142,500 views. Here is the look I was going for: 
I love watching Allison because we have very similar complexions so I feel like I have a shot at reproducing her makeup looks. The main thing in the way is those eyes! This girl has the biggest and roundest eyes to work with and unfortunately mine are itty bitty!
Here is the list of products Allison used to create this look and in parentheses are the substitutions I had to make if I didn't have the product:

Benefit Creaseless Cream Shadow in RSVP - (Maybelline Color Tattoo in Inked in Pink)

MAC Eyeshadows in Naked Lunch, Soft Brown, Sable, Sketch, Shroom, and Dazzlelight -(I substituted Naked 3's Liar for Sable. They are nearly perfect dupes)

MAC Fluidline in Dark Diversion- (Stila Smudgestick in Deep Burgundy)

Sigma Extended Wear Eyeliner in Boost - (Lorac Black eyeliner)

Maybelline Colossal Cat Eyes Mascara - (Tarte Lights Camera Lashes Mascara)

MAC Blush in Gingerly - (MAC Peaches blush mixed with the Body Shop Honey Bronzer)

Jouer Lipstick in Olivia - (Bite Beauty lipsticks in Musk and Lychee)


Here is the look I came up with!
This tutorial was extremely easy to follow along with and I found the look I was able to achieve was really close to Allison's example!
I can't quite capture the same lighting as Allison Anderson (she has studio lighting and a far nicer camera than my iPhone 5!) but I can assure you that this look turned out as it should have, deep burgundy eyeliner and all!

Time: 7 minutes
Difficulty of tutorial: 2/10
Likelihood to wear this look: 10/10
Similarity to Tutorial Example: 9/10 
Availability of Products needed: 8/10
Clarity of Instructions in Video: 10/10
Overall grade: A

This was a fantastic makeup look using some MAC eyeshadows I haven't reached for in a while! I love it for its simplicity and Allison's clear instructions make this tutorial a win that I think anyone can achieve as long as they can find comparable colors. 
If you want to try this look out yourself, watch Allison's video! It's only 4 minutes long. The screenshots from this post were taken from there: 
xxSJ

Check out my other Tutorial Try-Its!

Saturday, November 15, 2014

How to Wear Mint: Using NARS Habanera Eyeshadow duo

I received this NARS eyeshadow duo in the color 'Habanera' awhile ago as a gift and it has been taunting me from my makeup drawer ever since! With out a doubt this is my prettiest eyeshadow I own... just look at that mint green! And who would have thought that purple would compliment it so beautifully?? Today I decided to go for it and attempt to make a wearable look using the mint green shadow as the focus. 
Here's the result: 
I used a light nude color (MUG Beaches & Cream) and buffed it into my crease up to my brow bone. Then I used MAC's Soft Brown to further deepen the crease area. These two colors work great as transition colors and make blending SO easy.
Then it was time for the mint! I packed that gorgeous color all over my lid up to my crease. I made sure the color was nice and opaque across my lid. Finally I used the purple color in the duo and very carefully tapped that color into my crease. I did this last step slowly adding layer by layer to make sure it didn't get muddy!
Overall I love the way this look turned out! I think this look is multi-seasonal since you can play up the pastels or iciness of the mint or you can deepen it up further with the rich purple.

Color can be scary but there's usually a way to rock it with out being too 'out there.'  Just work with what you've got and be confident!

xxSJ
Friday, October 31, 2014

My Costume is my Face! Black Swan Makeup

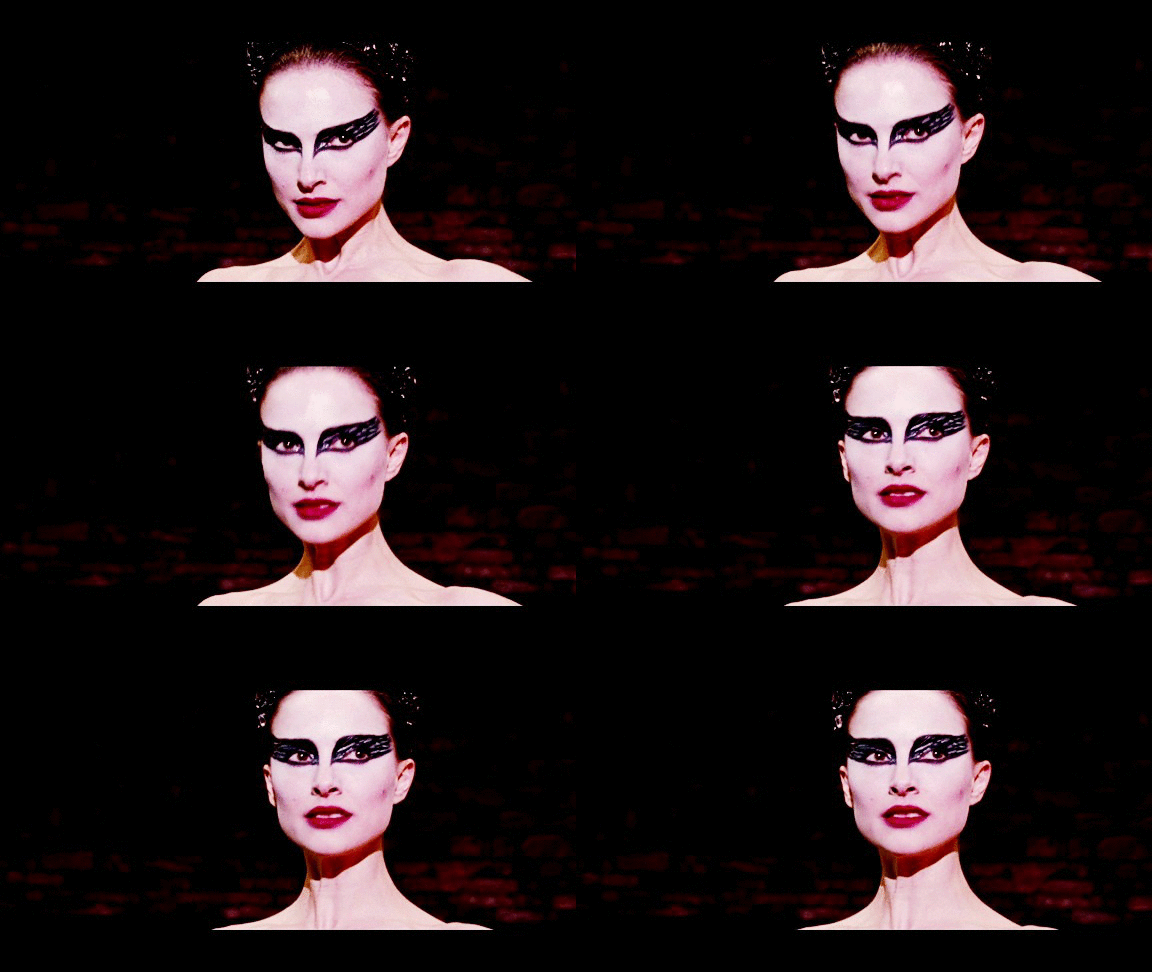
For my final installment of 'My Costume is my Face!' I decided to go with the simple and crowd-pleasing Black Swan makeup. And let me tell you... I felt it.

For this makeup look all I used was some gel eyeliner, my NYX jumbo eyeshadow pencil in Milk, and MAC Chili lipstick. Here's how I created this Black Swan look:
First I used the liner to outline the eyes. The line circles right around the bottom of the eye and extends straight outward toward the hairline. The inner line extends out toward the nose. From the nose I drew the line straight up toward the tip of my eyebrow and extended the line above my eyebrow and out toward my hairline. I also colored in all of my eyelid and eyebrows black. Then I took my Milk pencil and colored in the rest of the area.  Then I took my black gel liner again and did small strokes around my eyes all in the outward direction to make the feathery flicks Natalie Portman is sporting in the movie. Going over the white once makes a gray effect and then going over the white again creates a darker near black effect. Mix up how dark your strokes are! Keep the lowest V part mostly white and work hard to feather out the outer edge near the hairline. Then I put on my deep red lipstick and was done!
The one thing I was missing to complete this look was a beautiful crown so I went ahead and drew this one in :) The best thing about this look is that you don't even need the crown to be obvious! This makeup look is so easily identifiable that you can wear all black and put your hair up and everyone who has been awake for the past few years will know who you are. 
Happy Haunting everyone! Just know that when you wear this look...you have to be PERFECT. 


Check out my other posts from this Halloween makeup series!
Split Face
Owl
Shattered Doll
Lion

Wednesday, October 29, 2014

My Costume is My Face! Split Face Makeup

Symmetry is beauty, so that means this costume look is beautiful, right??? Well, not according to anyone I showed this to because this creeped people out!! Here's how I pulled off this split face makeup look:
I used my BH cosmetics 88 color palette, a red lipliner, a black liquid liner and my NYX Jumbo eyeshadow pencil. 
First I started by drawing the outline of the split with the red lipliner. I chose to go with this symmetrical cone shape down my whole face. Then I filled in and blended with my fingers. I went over the lipliner with red eyeshadow from my 88 color palette. All the shadows in this palette have shimmer in them which I think works to make this look shiny and wet like blood would look. I also added some purple and black in some areas for dimension. I used my NYX Shadow pencil in Milk to outline the red split lightly to make it stand out for. Then I used my black liquid eyeliner to draw some circles up my the sides of the split, parallel to each other. Then I 'laced' the liner up my face. I added some brown smokiness to my eyemakeup and some red lipstick to glamorize this otherwise creepy look!
Overall I love the way this look turned out. I think it turned out realistic and creepy yet still quite glamorous and pretty looking! From start to finish this look took me about 30 minutes, mostly because doing the lines lacing up my face needed to be done with a steady hand to look nice and neat.

Feel free to use this for an easy costume on Halloween using some simple makeup you might already have in your stash!

xxSJ

Check out my other posts from this Halloween makeup series!
Owl
Shattered Doll
Lion

Wednesday, October 22, 2014

My Costume is My Face!! Simple Lion Makeup

For my second installment of My Costume is My Face, I did a really simple yet effective lion makeup that I'm pretty sure ANYONE has the artistic capacity to do! Here's how you can be the queen of the jungle:
I used a simple black liquid eyeliner, Urban Decay 24/7 eyeliner in Smog and Demolition, and Revlon lipstick in 'Champagne on Ice.'
First I darkened and shaped my brows a little more intensely than usual to get that intense cat look. Then I drew on pretty large and dramatic wings for that 'cat-eye' effect. For the adorable little nose, I drew a triangle on the tip of my nose with black eyeliner and then drew a line straight down connecting my nose and upper lip.  I outlined my upper lip to be a little rounder than usual and then filled in with black liner.
For the bronzey lower lip, I lined it with Smog eyeliner (a bronzey gold) and then used Champagne on Ice lipstick to fill in.  For my little whisker freckles, I used Demolition eyeliner (a super dark brown).

I tousled my hair a little bit for a lioness effect and that's it! This look is oh so simple but oh so cute. You can be as fierce of a lion as you want to be while you're wearing this out, or you can be like me and think you're super fierce but really just look like this:
It's all good!

I hope you enjoyed this post and get inspired for the upcoming holiday!

xxSJ

Check out my other posts in this series!

Monday, October 20, 2014

My Face is My Costume!! Shattered Doll Makeup

Last minute halloween plans can be stressful...where are you supposed to pick up a costume you like in the 11th hour when you know everything worth wearing will already be sold out??? That's why I enjoy making my face be my costume by applying some clever makeup! Here is a shattered doll look I did in under an hour over makeup I already had on during the day. 
Here are the products I used:

 First I used a black eyeliner and created a bit of a dramatic winged liner look to round out my eyes a bit. Then I used my NYX Jumbo Eyeshadow Pencil in Milk and drew a thick line under my lower lash line and then lined under that with my eyeliner to make my eyes look bigger and more doll like. I then drew in a little white reflection mark with my Milk pencil on my lips and then colored my lips in with my Revlon Matte Balm in Unapologetic. I then used my black liner to make ventriloquist lines down the sides of my mouth and then filled in between my lips slightly for a plastic doll like effect.  I popped some super bright blush on my cheeks as well.  For the shattered glass, I pulled up a picture of broken glass on google and just went to town using black liner! It's as simple as that. To amp up this look, I would use some false eyelashes as well!
Happy haunting!
xxSJ

Wednesday, July 23, 2014

Review: LA Girl Pro Conceal HD Concealer

The LA Girl Pro Conceal Concealer is under the magnifying glass today, folks! This cheap and hard to find concealer is often raved about and compared to MAC concealer, so about a week ago I decided that I had to try this out! I found this concealer on Amazon for only $2 plus $2.99 for shipping. I was of course skeptical of the huge claims and the inexpensive price, but hey, I'm willing to try most anything out...it's just going to have to impress the hell out of me.  So go on, LA Girl...I'm listening.

The product comes in a little  plastic tube that houses 0.25 oz of concealer.  Squeezing the tube pushes some of the concealer out of the brush tip. 
I got the color Classic Ivory and I'm a little disappointed in the color. When buying makeup online, your only option is to look up as many color swatches as possible and of all the ones I saw of this color, I thought it would be far more white and less beige.  
Here is the color swatched next to my other favorite concealers.  From left to right is the LA Girl concealer, NARS radiant creamy concealer in vanilla, Maybelline Fit Me concealer in Fair, and Maybelline Dream Lumi touch concealer in Radiant.  The LA Girl concealer is far thicker and is more of a color match for the Dream Lumi concealer than any of the other ones I own due to its peachy color.
Top: No concealer, Bottom: Concealer under eyes
This concealer blends pretty easily and erases quite a bit of pigment from my undereye area.  It is pretty comfortable to wear all day and lasts a lot longer than my Maybelline Fit Me concealer which can wear off in only a couple hours.  My only real complaint about this concealer is that because of its thickness, if you don't take extra care in blending it in it will crease on your skin after a while.

My final verdict is that I'm not exactly shouting about this product from the rooftops.  It's a pretty good concealer that isn't quite as good as my NARS but also beats out some drugstore options. I really don't like the fact that I have to buy this on Amazon since the brand is so obscure, but I do think I'll buy it again in the future given that with tax and shipping this product only set me back $5.

xxSJ